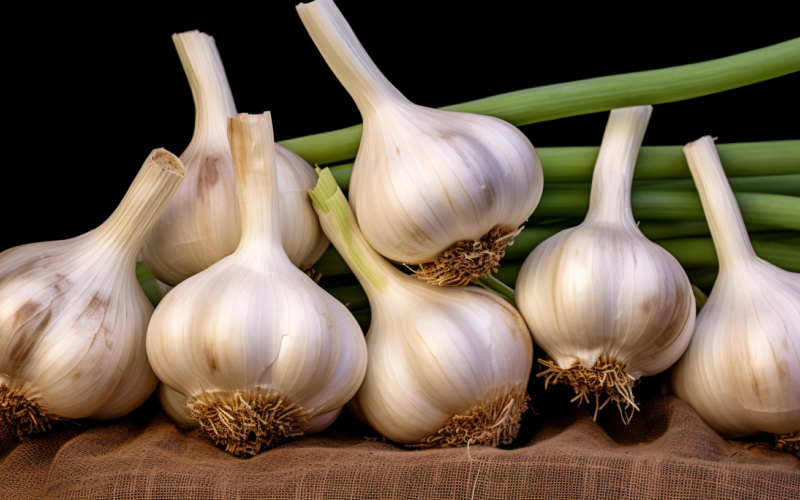
Garlic is not only a flavorful addition to many culinary dishes but also a rewarding crop to grow in your garden. With its distinctive taste and numerous health benefits, growing garlic at home allows you to enjoy fresh, organically grown bulbs right from your backyard. In this comprehensive guide, we will walk you through the step-by-step process of growing garlic, from planting to harvesting. We will also cover caring for your garlic plants, problem-solving, different garlic varieties, and tips for a successful harvest.
Planting Garlic
- Choosing Garlic Bulbs: Start by selecting high-quality garlic bulbs for planting. Look for disease-free bulbs with firm, plump cloves. You can either purchase garlic bulbs from a reputable nursery or use bulbs saved from the previous harvest.
- Preparing the Soil: Garlic thrives in loose, well-draining soil enriched with organic matter. Choose a sunny location in your garden and prepare the soil by removing any weeds or debris. Amend the soil with compost or well-rotted manure to improve its fertility and drainage.
- Breaking Bulbs into Cloves: Carefully separate the garlic bulbs into individual cloves, ensuring that the papery skin remains intact. Avoid removing the skin as it protects the cloves from damage and disease.
- Planting Depth and Spacing: Plant the garlic cloves with the pointed end facing up. Dig a hole or furrow in the prepared soil, approximately 2 inches deep. Space the cloves 4 to 6 inches apart, allowing enough room for them to grow into full-sized bulbs.
- Planting and Mulching: Place the cloves in the holes, ensuring they are at the correct depth. Gently backfill the soil, covering the cloves with approximately 1 to 2 inches of soil. Once planted, apply a layer of organic mulch, such as straw or shredded leaves, to conserve moisture and suppress weed growth.
Caring for Garlic
- Watering: Garlic requires consistent moisture, especially during the growing season. Water the plants deeply, providing approximately 1 inch of water per week. Avoid overwatering, as garlic bulbs may rot in excessively wet conditions.
- Fertilizing: Garlic benefits from a balanced fertilizer application. Prior to planting, incorporate a slow-release organic fertilizer into the soil. Additionally, you can side-dress the plants with compost or a nitrogen-rich fertilizer during the growing season to support healthy growth.
- Weed Control: Keep the garlic bed free from weeds, as they compete for nutrients and moisture. Regularly remove weeds by hand or use a shallow hoe, being careful not to disturb the garlic roots.
- Garlic Scapes: As garlic plants grow, they produce curly, flower-like structures known as scapes. To redirect the plant’s energy towards bulb development, it’s advisable to remove the scapes. Cut them off just above the top set of leaves and use them in cooking for a mild garlic flavor.
Problem-Solving
- Pests: While garlic is generally resistant to pests, a few common culprits may cause issues. Keep an eye out for aphids, onion maggots, or nematodes. If detected, treat the affected plants with organic pest control methods or consult your local agricultural extension for guidance.
- Diseases: Garlic can be susceptible to diseases such as white rot, purple blotch, or rust. To minimize the risk of diseases, practice crop rotation, provide proper air circulation, and avoid overwatering. If necessary, apply organic fungicides as a preventive measure.
Harvesting
- Timing: Garlic is typically ready for harvest when the leaves start turning yellow and drying out. This usually occurs in late spring or early summer, depending on the variety and growing conditions. Avoid waiting too long, as overripe bulbs may split or become less flavorful.
- Harvesting Technique: Gently loosen the soil around the bulbs using a garden fork or trowel. Carefully lift the bulbs out of the ground, taking care not to damage them. Brush off any excess soil and leave the bulbs to cure in a warm, dry, and well-ventilated area for 2 to 3 weeks.
- Storing Garlic: Once cured, remove any remaining dirt or dried foliage from the bulbs. Store the garlic in a cool, dark place with good ventilation. Braiding the dried stems together can create a beautiful and functional display while allowing the bulbs to remain easily accessible.
Garlic Varieties
- Hardneck Garlic: Hardneck varieties produce a central stalk known as a scape and offer a range of flavors and heat levels. Popular hardneck varieties include Rocambole, Porcelain, and Purple Stripe.
- Softneck Garlic: Softneck varieties do not produce scapes and are known for their excellent storage qualities. They are generally milder in flavor and include varieties like Artichoke and Silverskin.
Conclusion
Growing garlic is a rewarding endeavor that allows you to enjoy the distinct flavor and health benefits of this versatile herb. By following the steps outlined in this guide, you can successfully plant, care for, and harvest your own garlic bulbs. Remember to choose quality bulbs, provide proper care, and select the right variety for your preferences. With a little patience and attention to detail, you’ll soon be harvesting your own homegrown garlic and adding it to your favorite culinary creations.
